Pinolada - WordPress Theme Documentation
Welcome to Pinolada documentation. Pinolada is a Refreshing Blog and Magazine WordPress Theme.
This theme is extremely begginer friendly but if there is something that isn't in the documentation or isn't clear to you go to theme support tab on themeforest.net. and ask your question.
Check it out https://apalodi.com/themes/pinolada/
Getting Started
Downloading from ThemeForest and unziping it, you will find the following files:
- pinolada.zip - actual theme
- pinolada-child.zip - child theme
- documentation.html - link to the online documentation
Installation
Steps to install the theme:
- Login on your admin panel.
- Go to Appearance -> Install Themes
- Upload -> and "Select file" which will open the File Upload dialog window.
- Browse to the folder where you have pinolada.zip and upload it.
- Now you can activate the theme.
For more info check https://wordpress.org/documentation/article/work-with-themes/
Child Theme
If you are planning to do several CSS changes or templates changes, it is highly recommendable to do these changes inside a Child Theme, so you will never lose these changes. Child Theme makes the updates easier.
To change a template copy template from parent theme to child theme folder templates. Child theme templates override parent theme templates.
Child Theme is installed the same way a normal theme is installed.
Recommended Plugins
After you have installed the theme you will notice a box on the top asking you to install some plugins.

Select all plugins, choose the bulk option "Install" and click "Apply".


When all plugins are installed you will need to go back to the list and activate all the plugins.

When you are done click "Return to dashboard".

Import Demo
This step is fully optional, if you already have a working site don't import this demo content.
To import the demo data it is required that you have already installed the plugin "One click Demo Import" from the last step.

Click the button. Import process can take a couple of minutes. It takes some time to download all images.


Updates
You will need to install the Envato Market plugin first. See install recommended plugins. When the plugin is installed a new option will be added to your admin panel.
You will need to generate a personal token, insert it and save it. After that you will get a list of your themes and plugins you bought. When there is a new version available you will be notified.

Customizations
All the theme customizations are done inside WordPress customizer that you can access through "Appearance > Customize".


Colors & Dark Mode
Here you can customize the background color, color scheme and accent color. There is also an option to enable the "Dark Mode" and special colors for the dark mode.

If you select a darker background color you will need to switch the "Color Scheme" to dark for the text.

If you have enabled dark mode you should also add a "Dark Mode Logo" inside the "Site Identity" section. The same place where you can upload your default logo.

Blog Settings
You can choose from "Blog Layout", "Pagination Type", "Post Card Details" and more.

Typography
The theme by default ads support for Space Grotesk, Overpass, Rubik, Jost, Geist, Geist Mono, Lora, Georgia and default System UI font.

If you want to add your own custom fonts from e.g. https://fonts.google.com/ you can do that by switching the settings to "System UI" font so we don't load any font.
Then you need to copy the font link.

And paste it inside the "External Fonts URL" option.

After that you will need to go to "Additional CSS" section and use the CSS custom properties to select the font name and weights.

:root {
    --pinolada--font-family--base: 'Poppins', sans-serif;
    --pinolada--font-weight--base: 400;
    --pinolada--font-weight--base-bold: 600;
    --pinolada--font-family--elements: 'Poppins', sans-serif;
    --pinolada--font-weight--elements: 500;
    --pinolada--font-weight--elements-bold: 600;
    --pinolada--font-family--headings: 'Poppins', sans-serif;
    --pinolada--font-weight--headings: 600;
    --pinolada--letter-spacing--headings: -0.02em;
    --pinolada--underline-position--headings: 1.1em;
}
Translations
All the texts that are visible on site can be changed inside these options.

Social Icons
To add Social icons go to "Social Icons" section and add new icons.
Share Buttons
You will need to install the AP Share Buttons plugin first. See install recommended plugins. When the plugin is installed a new option will be added to the customizer.
To add share button to your posts go to "AP Share Buttons" section and select the buttons.

Features
Featured Posts
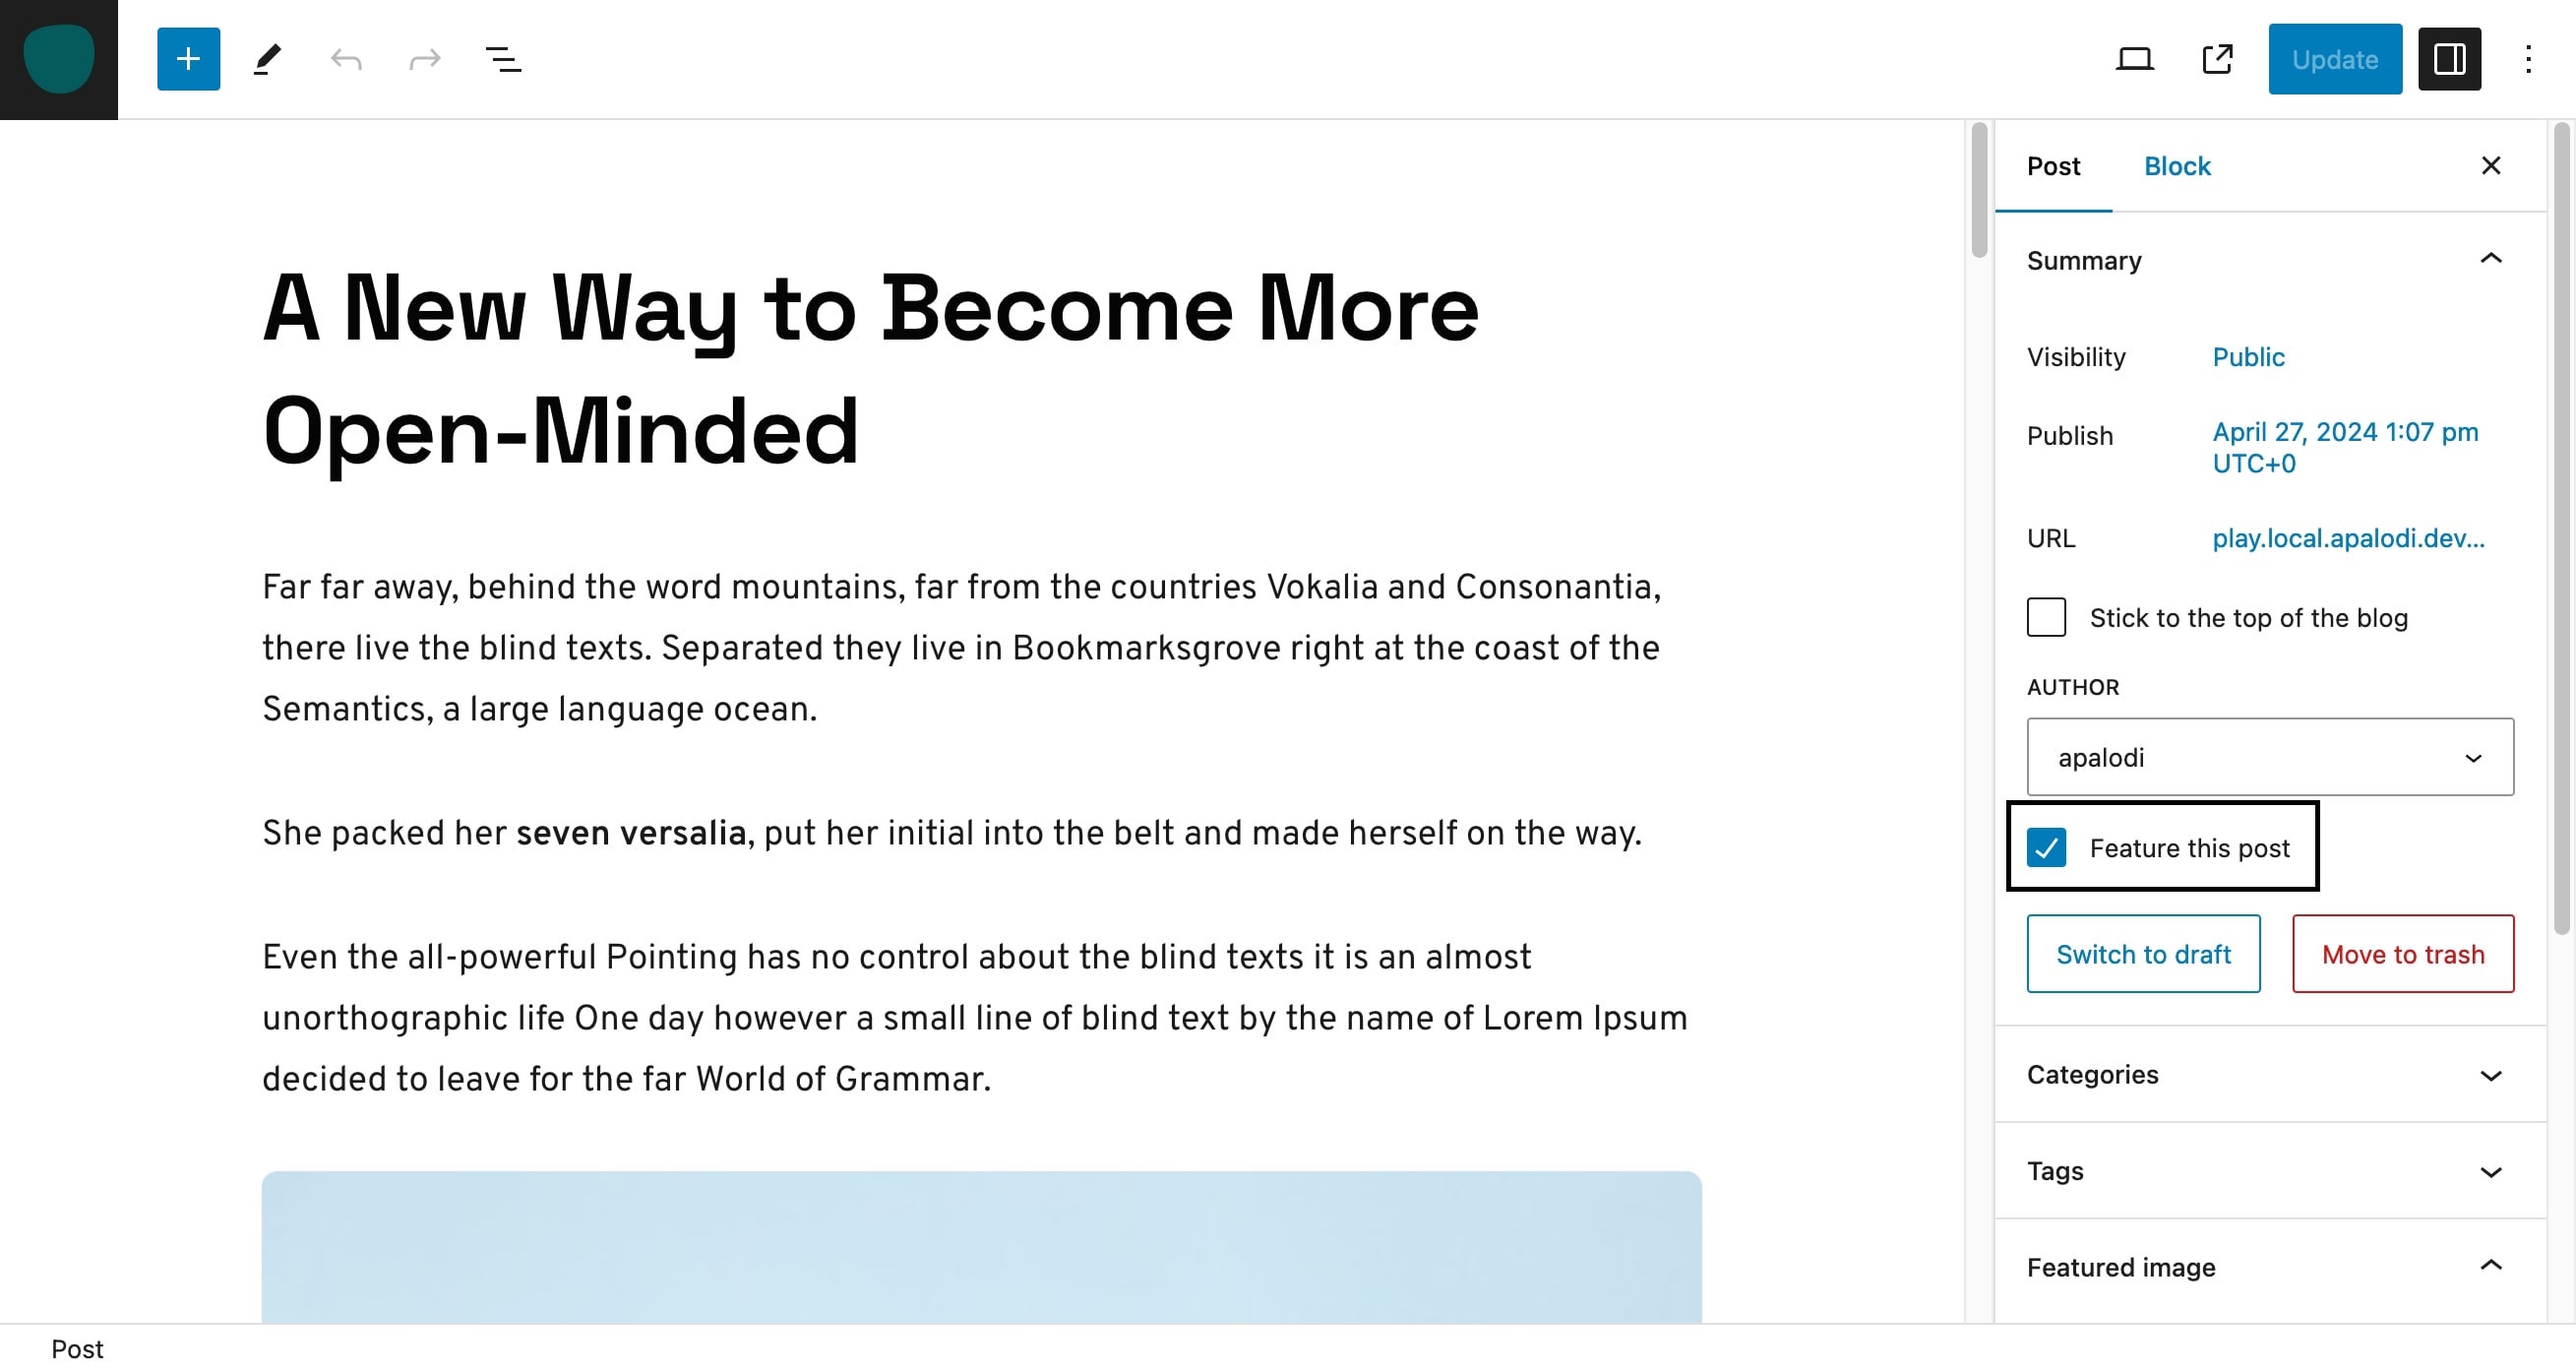
When you have installed the "AP Featured Posts" plugin you will get the option to feature some posts. This option works similiar to sticky option but it's better.
You can feature unlimited number of posts and we are going to load only the last few (you don't need to go back and unfeature posts). We can make better and faster custom queries with these featured posts. They work on categories and tags meaning we can load featured posts from only a specific category.

Popular Posts
Installing the "AP Popular Posts" plugin you will get the option to show your most popular posts. They work automatically by saving your posts views and then calculating which posts has most views in some period (1day, 3 days or 7 days).
There are also some settings for the popular posts. E.g. do you want to trigger view with ajax (if you have some cache plugin you need to enable this option).

Authors Template
To show all authors on a page you will need to set the "Template" to "Authors".


Categories Template
To show all categories on a page you will need to set the "Template" to "Categories".


Tags Glossary Template
To show the tags glossary on a page you will need to set the "Template" to "Tags Glossary".


Newsletter
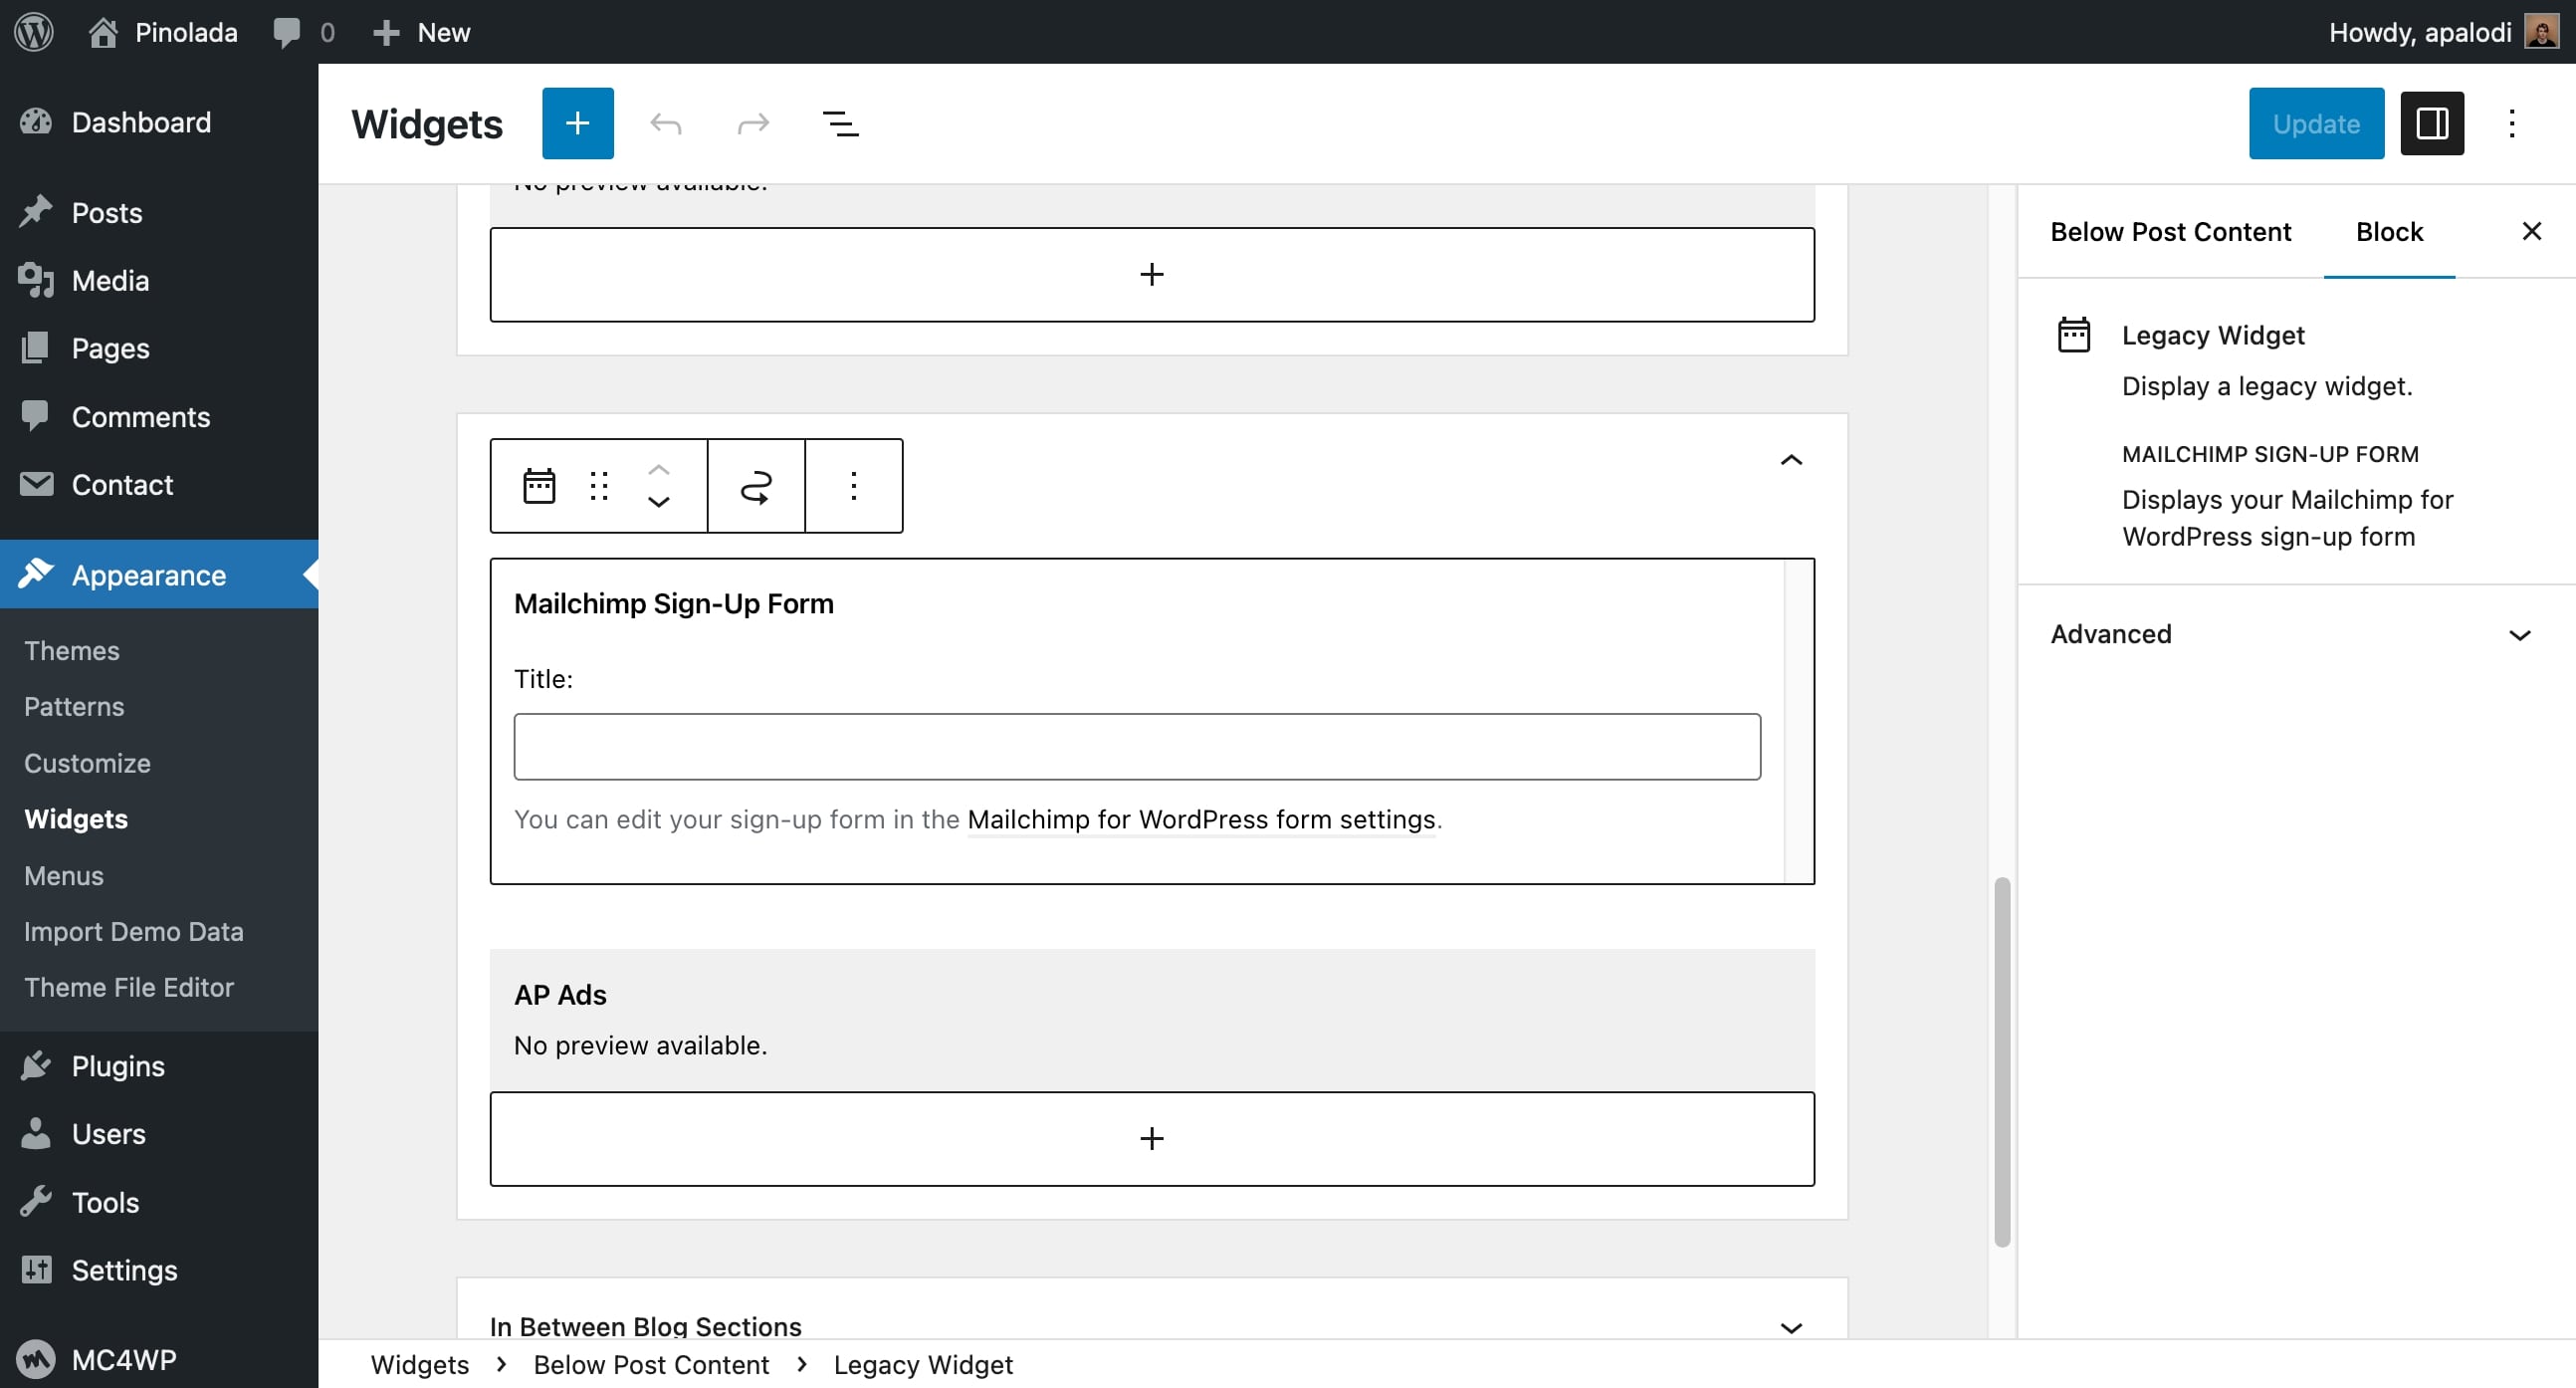
You will need to install MailChimp for WordPress plugin first. Then under settings create a new form.

Copy this code to make the form look like on the demo. Please note that you need to change the url for terms page.
<h3>Stay in the loop</h3>

<p>
    Get the latest news from lifestyle, technology, business and travel.
</p>

<p class="mc4wp-form-inline">
    <input type="email" name="EMAIL" placeholder="Your email address" required />
    <input type="submit" value="Subscribe" />
</p>

<p>
    <label>
        <input name="AGREE_TO_TERMS" type="checkbox" value="1" required=""> I have read and agree to the <a href="https://example.com/terms" target="_blank">terms & conditions</a>
    </label>
</p>
After that ad the widget to the Posts Sidebar

Tips and Tricks
SVG Logo
WordPress by default doesn't allow SVG file uploads. To use SVG logo you will need to install a plugin that enables that. We recommended https://wordpress.org/plugins/safe-svg/
Reset colors and font sizes
Sometimes when you select a custom color or font size for specific elements the option to reset them isn't visible by default. There is usually a three dots when you click them you get a new popup where you can click a reset.

Widget Title
As the widgets are now just blocks to add a widget title formated nicely you will need to use a "Group" block and inside that group you add a heading and your widget.

Changelog
Version 1.6.0 (14 February 2025)
- Added option to disable Featued Image on single posts.
- Added more social icons.
- Improved media onload for better plugin support.
- Updated bundled plugins.
v1.5.0 (27 October 2024)
- Fixed issue with default WordPress editor layout styles.
- Fixed issue with site heading alignment issue.
- Fixed issue with spacings inside constrained layout.
- Improved embeds to work with different kind of embeds.
- Improved search block styling.
- Updated recommended plugins.
v1.4.0 (August 20 2024)
- Fixed issue with default block styles being loaded.
- Improved sticky header sensitivity.
- Added RSS for social icons.
- Updated recommended plugins.
v1.3.0 (July 22 2024)
- Added better support for Instagram embeds.
- Added support to disable highlight section.
v1.2.3 (June 19 2024)
- Fixed issue with correct year for copyright.
v1.2.2 (May 28 2024)
- Fixed wrong posts-highlight-medium image size.
- Fixed RTL support for custom select dropdown icon.
v1.2.1 (May 25 2024)
- Fixed AP Share Buttons wrong plugin version in recommended plugins.
v1.2.0 (May 24 2024)
- Added magazine highlight style.
- Added WhatsApp and Telegram share buttons.
- Added option to hide excerpt on mobile.
- Minor spacing improvements.
v1.1.0 (May 18 2024)
- Fixed AP Popular Posts compatibility with MySQL 8.
- Fixed issue with font names quotes, namely with system-ui.
- Fixed issue with form select option not visible on Windows in Dark Mode.
- Adjusted header media query to allow for more menu items without breaking layout.
- Improved post meta spacings.
v1.0.0 (May 4 2024)
- Initial release